Recipe in hand, you’re about to unlock the nutritional power of moringa leaves by transforming them into moringa powder. This superfood is packed with vitamins, minerals, and antioxidants, making it a fantastic addition to your diet. To create your own, you’ll need fresh moringa leaves, and understanding the drying process is vital to preserve their nutrients and flavor. With the right steps, you can enjoy the health benefits of moringa powder at home, ensuring that your culinary creations are both delicious and nutritious.
Table of Contents
Key Takeaways:
- Harvesting: Begin by picking fresh moringa leaves from the tree, ensuring they are healthy and free from pests.
- Drying: Spread the leaves evenly in a well-ventilated area, away from direct sunlight to retain their nutrients and color. Allow them to dry completely, which may take a few days.
- Grinding: Once dried, use a blender or grinder to process the leaves into a fine powder. Store the moringa powder in an airtight container to preserve its freshness.

Understanding Moringa
To appreciate the rich heritage of moringa, you must understand its origins and uses. Moringa, often referred to as the “drumstick tree”, is native to parts of Africa and Asia. Renowned for its nutritional density, it has been utilized for centuries in traditional medicine and as a staple food source. Known for its high levels of vitamins and minerals, moringa is gaining popularity as a superfood in modern diets.
Nutritional Benefits
Benefits of incorporating moringa into your diet are numerous. This powerful plant is packed with imperative nutrients including:
- Vitamin A
- Vitamin C
- Calcium
- Iron
- Protein
These nutrients contribute to improved overall health, with evidence suggesting benefits for immune function and anti-inflammatory properties.
Types of Moringa Leaves
Moringa leaves come in different varieties, each offering unique benefits. Here are some commonly recognized types:
- Moringa oleifera
- Moringa stenopetala
- Moringa peregrina
- Moringa concanensis
- Moringa pterygosperma
Thou can explore each type’s characteristics to understand which aligns with your health objectives.
| Type | Description |
| Moringa oleifera | Most common, widely used for food and supplements. |
| Moringa stenopetala | Known for its larger leaves, cultivated mainly in Kenya. |
| Moringa peregrina | Often found in arid regions, known for its oil-rich seeds. |
| Moringa concanensis | A lesser-known type with medicinal applications. |
| Moringa pterygosperma | Recognized for its distinctive winged seeds. |
To choose the best moringa leaf for your needs, understanding their unique profiles can aid in your selection. Focus on factors such as potency and nutritional content to align with your dietary goals. By selecting the right type, you enhance the health benefits you can derive from moringa. Thou should stay informed about their properties to maximize your experience.
| Type | Health Benefits |
| Moringa oleifera | Rich in antioxidants, enhances vitality. |
| Moringa stenopetala | Supports digestive health. |
| Moringa peregrina | Promotes skin health through oil extraction. |
| Moringa concanensis | Aids in reducing inflammation. |
| Moringa pterygosperma | Encourages blood circulation. |
Factors to Consider
There’s much to contemplate when preparing to make moringa powder. You should account for the following:
- Moringa source
- Soil quality
- Climate conditions
- Harvesting methods
Perceiving these aspects will help ensure you obtain the best quality moringa for your powder.
Moringa Source Selection
If you aim to produce high-quality moringa powder, selecting the right source is vital. You’ll want to find organic, non-GMO moringa leaves from trusted suppliers to ensure purity and potency.
Soil and Climate Conditions
Some soil and climate conditions significantly impact the quality of your moringa. You need to ensure your moringa grows in well-drained, loamy soil and in a warm climate with sufficient rainfall or irrigation.
Source your moringa from areas with optimal growing conditions. Ideal soil should be rich in nutrients and have a pH level between 6 and 7.5. The climate should remain warm, ideally between 77°F and 86°F, to promote healthy growth. Excessive moisture can lead to root rot, while extreme cold can stunt plant development. Thus, a balanced environment is paramount for maximizing the quality and nutrient content of your moringa leaves.
How to Harvest Moringa Leaves
For a successful harvest, focus on cutting mature Moringa leaves, ideally around 5-6 months after planting. Choose healthy plants with vibrant green foliage, and ensure to harvest during the dry season when the leaves are less prone to disease. This will maximize the nutritional quality of your leaves while providing you with a bountiful supply for powdering.
Timing and Techniques
Harvesting is best conducted in the morning or late afternoon when temperatures are cooler, as this helps preserve the freshness of the leaves. Use clean, sharp scissors or pruning shears to make clean cuts, which minimizes damage to the plant and encourages regrowth. It’s advisable to gently pull the leaves rather than ripping them off, as this prevents bruising.
Equipment Needed
With the right tools, your harvesting process will be more efficient and effective. Equip yourself with clean scissors or pruning shears for making precise cuts, and consider using a basket to collect the leaves without crushing them. Wearing gloves is optional but can protect your hands while handling the plants.
A good pair of scissors or pruning shears is vital for harvesting Moringa leaves properly without damaging the plant. Look for tools with a comfortable grip to reduce strain during extended harvesting sessions. A basket helps keep your harvested leaves intact, making it easier to transport them for drying. Although gloves are not necessary, they provide protection against any potential irritants, ensuring your hands remain clean and free from dirt during this process. Ensuring you have quality equipment will make your harvesting experience smoother and more productive.
Drying Moringa Leaves
Now that you’ve harvested your moringa leaves, it’s time to dry them properly. Drying is important for preserving the nutritional value and flavor of moringa. Make sure to remove any damaged leaves and wash them thoroughly before drying. Whichever method you choose, ensure that your leaves are dried consistently, allowing you to grind them into high-quality moringa powder later.
Methods of Drying
If you’re wondering how to effectively dry your moringa leaves, there are a few methods you can consider. You can air dry them in a shaded area, use a dehydrator, or even bake them in an oven at a low temperature. Each method has its own benefits depending on your available resources and time.
Ideal Temperature and Humidity
Ideal conditions for drying moringa leaves involve maintaining an appropriate balance of temperature and humidity. You should aim for a temperature range of 25°C to 35°C (77°F to 95°F) and keep humidity levels below 60% for optimal drying. Visit the table below for further details.
Optimal Drying Conditions
| Temperature Range | 25°C – 35°C (77°F – 95°F) |
| Humidity Level | Below 60% |
This ideal temperature and humidity ensure that the leaves dry effectively without losing their important nutrients. If the humidity is too high, you risk mold growth, which can spoil your leaves. On the other hand, drying at too high a temperature can degrade nutritional quality. Monitor your environment carefully to achieve the best results.
Risks of Improper Conditions
| High Humidity | Risk of mold and spoilage |
| High Temperature | Nutrient degradation |
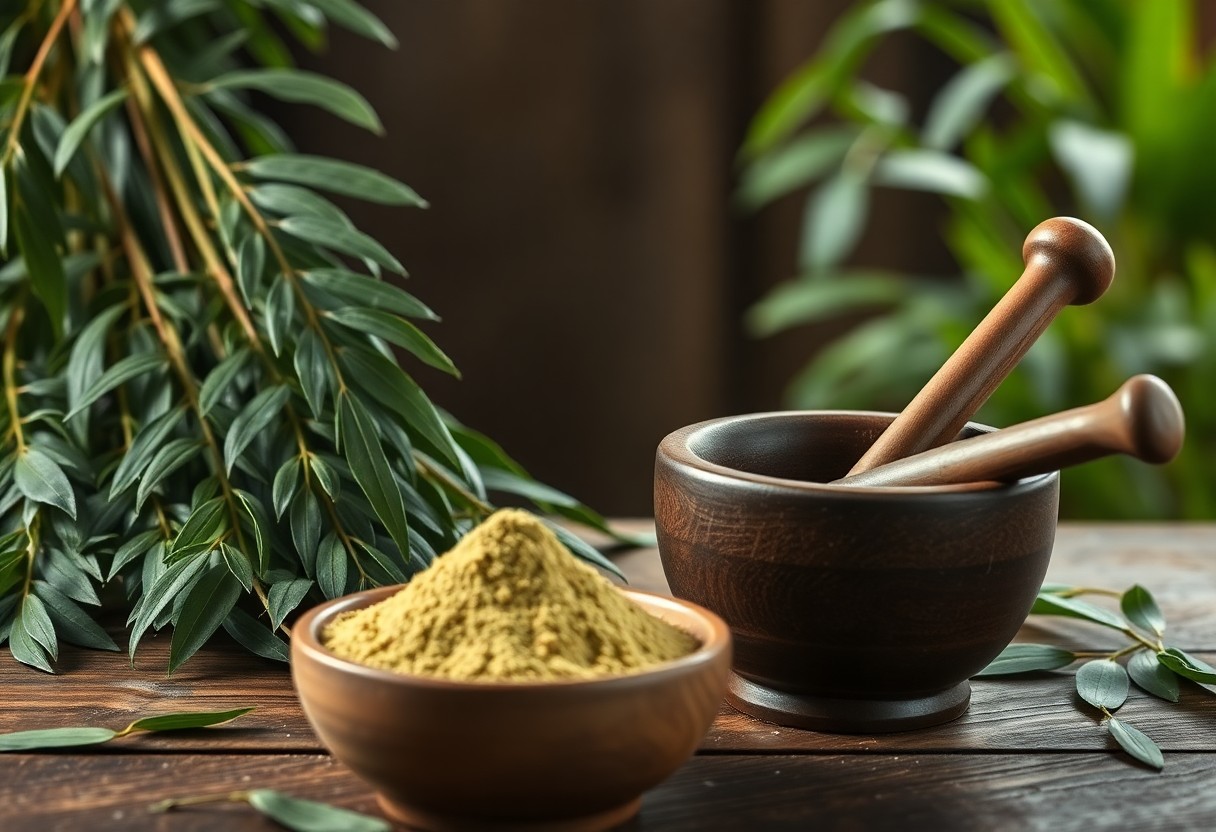
Grinding Moringa Leaves
After drying your moringa leaves, it’s time to grind them into a fine powder. This process helps to release the nutrients present in the leaves and makes it easier to incorporate into your meals, smoothies, or supplements. Ensure that your leaves are completely dry to achieve the best results and to avoid clumping.
Equipment Options
Any effective grinding method will suffice for making moringa powder. You can use a mortar and pestle for a traditional approach, or opt for electric grinders like a coffee grinder or a high-speed blender for a quicker, finer result. Just make sure the equipment is clean and dry to maintain the quality of your moringa powder.
Achieving the Right Consistency
Grinding your dried moringa leaves effectively is vital for optimal usage. To achieve the desired consistency, you may need to grind in small batches, ensuring even processing. Start with short bursts to avoid overheating the leaves, which can lead to nutrient loss. The final product should be a fine, green powder that easily mixes with liquids, allowing you to reap the maximum benefits of this nutritious superfood.
To perfect your moringa powder, you may want to sift the mixture after grinding to remove any larger particles. This extra step will help refine the texture, giving you a smooth and versatile powder. If you find that your powder is clumping, it could indicate that the leaves weren’t fully dried before grinding, so always double-check the drying process to ensure you’re working with quality moringa. Your goal is to maintain the nutritional integrity while obtaining a consistency that easily blends with your diet.
Storing Moringa Powder
Once again, proper storage of your moringa powder is crucial to maintain its nutritional benefits and flavor. Keep your powder in a cool, dry place away from sunlight, as heat and light can degrade its quality. A well-sealed container will help prevent moisture and pests from ruining your supply, ensuring that you can enjoy the rich benefits of moringa for an extended period.
Packaging and Containers
Any airtight container, such as glass jars or vacuum-sealed bags, is ideal for storing your moringa powder. These options help to preserve its freshness by preventing air and moisture from entering, which can lead to spoilage. Choosing opaque containers can also protect the powder from light exposure, further enhancing its shelf life.
Shelf Life Considerations
Some factors affect the shelf life of moringa powder, including storage conditions and packaging. Typically, if stored properly, you can expect your moringa powder to last up to 1 year without significant loss of potency. However, you should always check for changes in color, smell, or texture, as these signs indicate that the powder may have gone bad.
Moringa powder’s shelf life can be significantly influenced by environmental conditions. Keeping it in a cool, dark area helps maintain its nutritional value, while exposure to heat, humidity, or light can shorten its usability. To maximize the shelf life, always seal the container tightly and avoid using wet utensils when scooping out the powder. By doing so, you’ll ensure that you preserve the nutrient-rich goodness of moringa for your health benefits.
Final Words
Taking this into account, making moringa powder at home is a straightforward process that can empower you to harness the nutritional benefits of this superfood. Begin by harvesting fresh moringa leaves, washing them thoroughly, and drying them in a cool, dark place. Once completely dried, grind the leaves into a fine powder using a blender or food processor. For detailed guidance, check out this Homemade Moringa Leaves Powder Recipe — Chhaya’s Food. With your homemade powder, you can boost your smoothies, soups, and more!
Q: What is the process for making moringa powder?
A: The process for making moringa powder involves several steps. First, you need to harvest the leaves from the moringa tree. It is best to choose young, green leaves for optimal nutrient content. Once harvested, wash the leaves thoroughly to remove any dirt or insects. After washing, spread the leaves out on a clean surface or use a dehydrator to remove moisture. This drying process can take a few hours to a couple of days, depending on the method used and environmental conditions. Once the leaves are completely dry and crisp, grind them using a blender or coffee grinder until you achieve a fine powder. Finally, store the moringa powder in an airtight container away from sunlight to maintain its freshness and nutrient quality.
Q: How can I ensure that the moringa leaves are properly dried?
A: Properly drying moringa leaves is imperative to making high-quality moringa powder. To do this, choose a well-ventilated area to spread the leaves out, preferably a shaded location to avoid direct sunlight, which can degrade nutrients. If using a dehydrator, set it to a low temperature to preserve the leaves’ nutritional values. You can check if the leaves are fully dried by feeling them— they should be crispy and crumble easily. If the leaves still feel pliable or moist, continue drying until they reach the desired texture.
Q: How should I store moringa powder for maximum freshness?
A: To store moringa powder for maximum freshness, use an airtight container to prevent moisture, air, and light exposure, which can degrade the powder’s quality. Glass jars, vacuum-sealed bags, or high-quality plastic containers work well for storage. It’s best to keep the container in a cool, dark place, such as a pantry or cupboard. Always label the container with the date of production. Properly stored moringa powder can last for several months, but for the best flavor and nutritional benefits, try to use it within three to six months of making it.